Tuesday, September 28, 2010

Cider Saturday: The Recipe: Caramel Apple Cider

This post is dedicated to my old college roommate, Leslie, who originally coined the term "Cider Saturday" a few Autumns ago. :-)

I hope you've had a chance to see my photo blog about making cider the old-fashioned way. Since I already shared a complicated cookie recipe involving cider last week, this week, I have a simple cider drink recipe that is all-homemade and all-delicious! You could pour some caramel sauce from a jar into some apple cider, but last I checked, most of the ice cream toppings that are widely available are artificially flavored. So, I have a microwaveable 1-mug recipe for you to make caramel from scratch and add some cider, and it's so easy, you won't even have to worry about your hair. And it would make a great addition to any harvest party menu because it's a new twist on two old favorites: caramel apples, and apple cider. I hope you love it half as much as my mother does!

Caramel Apple Cider

1 Tablespoon brown sugar
1 teaspoon butter
1 teaspoon whipping cream
Apple cider (about 1 Cup)

Microwave brown sugar and butter in a microwave-safe mug for 1 minute.
TIP: Instead of mashing butter into a teaspoon, use the Tablespoon marks on the butter wrapper - a teaspoon
is 1/3 of a Tablespoon, so cut accordingly. Stir together and add cream. Microwave an additional 30 seconds. Stir, and add a small amount of cider, stirring constantly. TIP: Adding a lot of cider (which is probably cold from the fridge) to the hot caramel sauce will cause the caramel sauce to instantly get sticky and hard; adding a little cider and stirring well will sort of temper the caramel (this is the opposite of slowly raising the temperature of egg yolks in a custard recipe; here we are slowly lowering the temperature of the caramel sauce). After the caramel and cider are mixed, slowly add the rest of the cider, and then microwave another 1.5-2 minutes. TIP: All microwaves vary, so you may need to
adjust the amount of time within each stage of this recipe; using a clear glass mug will allow you to see
what is happening. After heating for the last time, stir well and enjoy! The caramel will float to the top in the microwave, but if you stir it well it should stay relatively well mixed; I used a small whisk. TIP: Feel free to add spices as you would to hot mulled cider. I like cinnamon and cloves, but nutmeg, ginger and allspice are all great harvest flavors. TIP: Don't use a mug that's too small, or your caramel-to-cider ratio will be a little strong on the caramel side; I made this for my grandparents in their smaller mugs and it was much too sweet.


Party-Size:
6 Tablespoons brown sugar
2 Tablespoons butter
2 tablespoons cream
6 Cups Apple Cider
Microwave times will definitely be longer, but with a quantity this large, it's probably much easier to do this in a large sauce pan or stock pot. Just melt the brown sugar and butter together over medium heat, add the cream, stir in a little of the cider (as explained earlier), and then add the rest and heat to simmering.


His and hers (my parents'):

Sunday, September 26, 2010

Cider Saturday: The Photos
Dad and I took off on the Suzuki for my Great-Uncle Jim and -Aunt Karen's house. They only live about fifteen minutes away, and have a few apple trees and an old-fashioned cider press.


The late-morning, late-September sun warmed us through the cool breeze that would eventually knock over our red plastic cups.


Below, you can see the gentlemen - that's my Dad, Uncle Jim, and Grandpa Dave - shaking down the tree so the apples will simply fall for us; a bruise here or there isn't an issue when you're going to squish the apples far beyond bruises. Then to save back-breaking kneeling time, we raked them into piles we could easily reach.


That's me (above), picking up apples. Aunt Karen (in gray) and Grandma Barb (in green or red) had started washing apples in a small bucket, but that quickly became tedious, so they went for the giant one. After a scrub in a water and vinegar solution to clean the apples and remove pesticides, Uncle Jim or Grandpa Dave sprayed them off with the hose.

These red apples are from the apple tree at our house, a gift from my grandparents years ago. They brought some yellow apples as well, but the bulk was from Uncle Jim's tree. He likes to use a 2-to-1 ratio of yellow-to-red apples. The Yellow Delicious are sweet, and the Red Delicious brighten the flavor.


You can't take on this project if you're afraid of bees. They were everywhere, but luckily no one was stung.


Jim was explaining that he bought the press at a sale, years ago. He's made some adjustments, as you can see: that huge wheel on the left side is normally turned by hand. He rigged a motor and a belt to do the hard part for us.


"Buckeye, Latest Improved, R.P. Last & Co, Springfield, O"
The apples go in the hopper on the top, and the large side wheel is turned to operate the inner paddles that crush the apples. (See photos above and below.) The paddles you can see in the hopper are next to sharp teeth, and above another set of smaller paddles that you can't see.


These are the slats where the cider will trickle out.


.


Above, you can see Jim throwing apples into the hopper, from the massive pile behind him. Below is a view into the barrel of the crushed apples after they've passed through the paddles. There's so much juice dripping from the machine!


Once the barrel is full, it's pushed to the back of the machine (above), over the slats I showed you earlier. Then a fitted board is placed under the press, and the top wheel is turned to tighten and press the cider from apples (below).


Jim tightens the wheel as far as he can by hand, then reaches for a baseball bat for a little extra leverage (above). And there's that beautiful, gushing cider! That's a wire kitchen strainer over the pot that is catching the cider, for an initial filtering (above). That barrel of crushed apples starts about 60% full, and ends up in a 5" cake. (Back to that in a moment.)


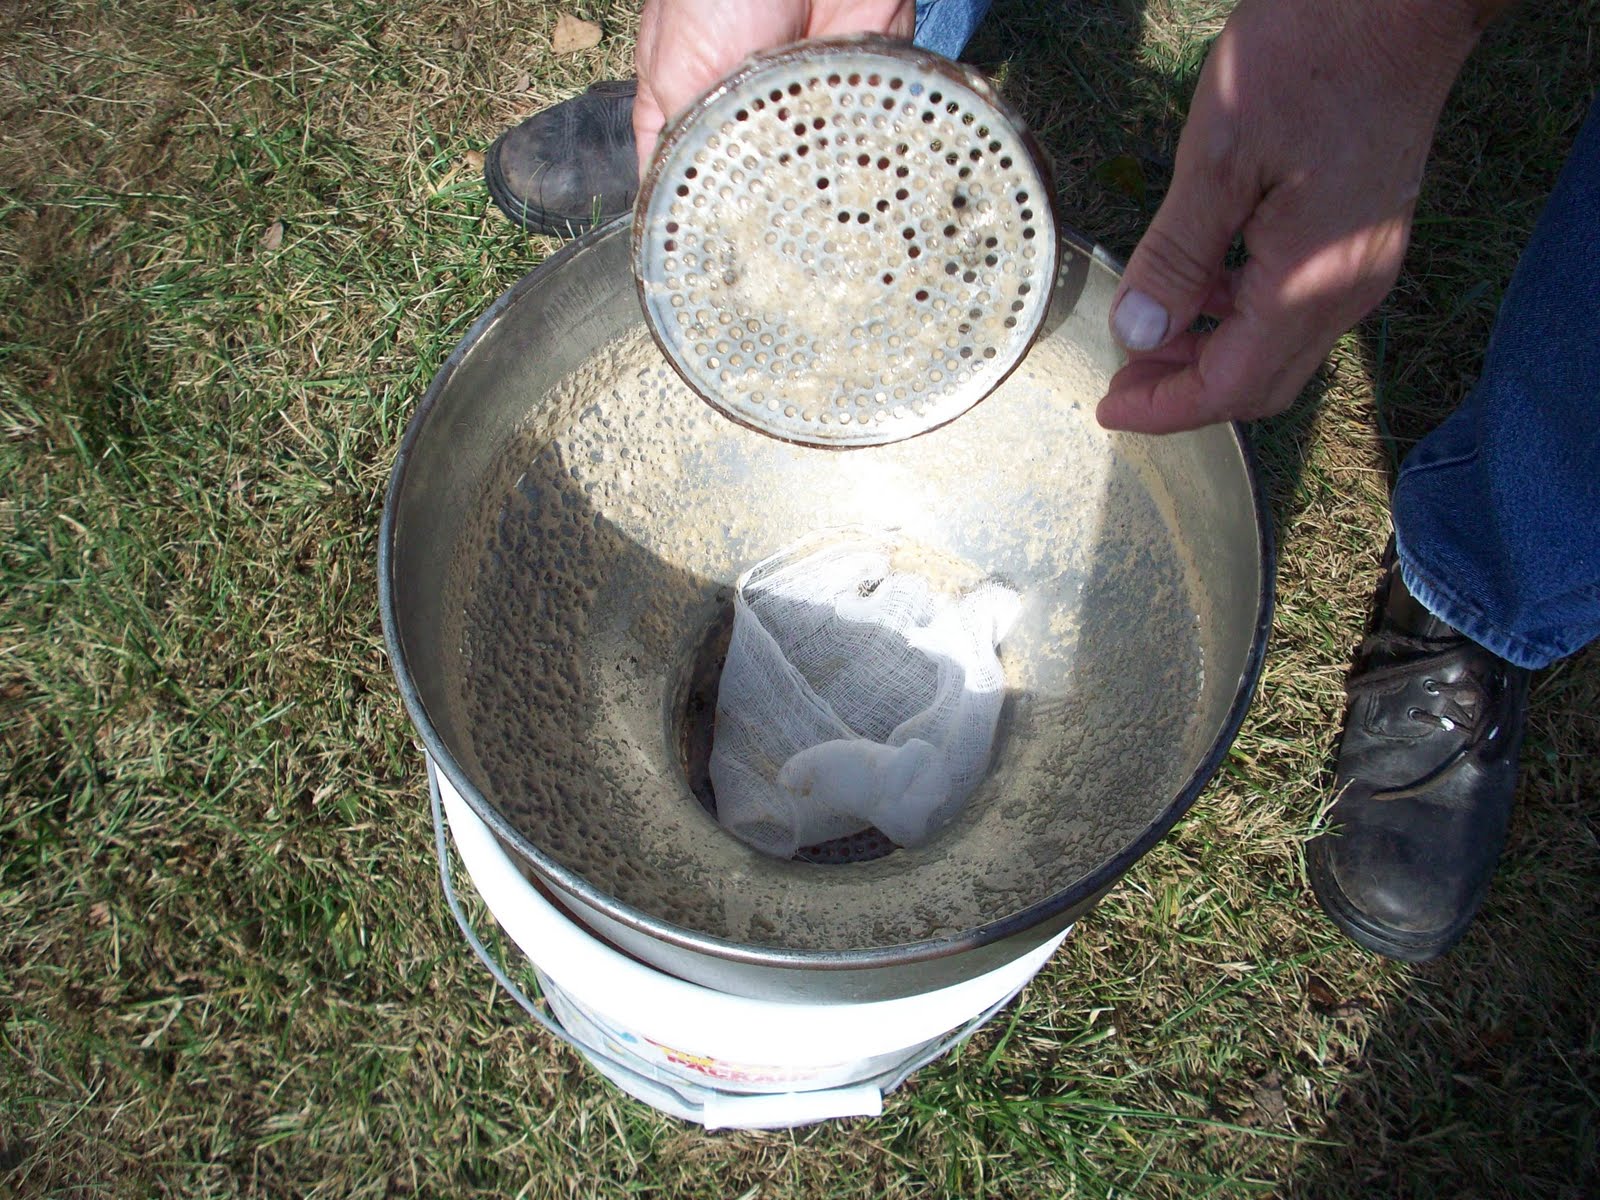
Jim dumped the cider - which had already been through a wire kitchen strainer - into an old dairy funnel with a cheesecloth filter fashioned into the bottom.


.


It's very foamy (above). You can see the handle in the bottom of the funnel; that 6" circle is a large strainer itself, and sits over a permanent identical plate. Between the plates is the cheesecloth. That's a used cheesecloth strainer Jim is dangling (below left), and a fresh one he's inserting between the strainer plates (below right).

And here we are, dipping into the very first bucket of cider. I couldn't have been happier (and took my hair down for the photo).

Back to that apple cake. Jim and Grandpa slid the tray out (above left), and Jim carried the giant cake out to the garden to spread it for compost (above right). There were beautiful Morning Glories growing wild in the sweet corn stalks (below).


Between each batch, the barrel and tray were sprayed out to cut down on stickiness (above). You can see Grandpa sprayed them down as Jim started crushing the next barrel's contents.


Indoors, we had empty milk jugs cleaned and waiting to be filled (above left). Jim showed Grandma and I how to hold an old coffee basket filter over a funnel, to simultaneously bottle the cider and filter it a third time (above right). We left a lot of space at the top in most jugs, because the plan was to freeze most of it and unthaw it as we consume it (below left). TIP: Grandma also filled some stackable containers she had saved for easy storage in the bottom of the deep freeze (below right).

All in all, we made 28 gallons on Saturday (only a fraction are seen above left), and Jim's tree is still half-full of apples, so this project may be repeated this season. Everyone took a break to enjoy the cider and the beautiful afternoon, including Jim and Karen's grandchildren, Erica, Logan and Brie (below). Erica and Logan took their cups into the apple tree, but Brie stopped to grin for a photo.


Coming Soon: Caramel Apple Cider!